
CAN Assessments – Quick Guide
To download or print this document, please click here.
Table of Contents
How to upload files and documents in HMIS
Additional Assessments in CAN Assessments menu
Overview
This guide was created to help navigate the forms a CAN Network user may need to access for the Coordinated Access Network. Please email our helpdesk at help@nutmegit.com if you have any questions or need assistance.
Instructions
Each of the forms listed below can be accessed by clicking on the CAN Assessments option in the left side menu. The sub menu will load as pictured below:
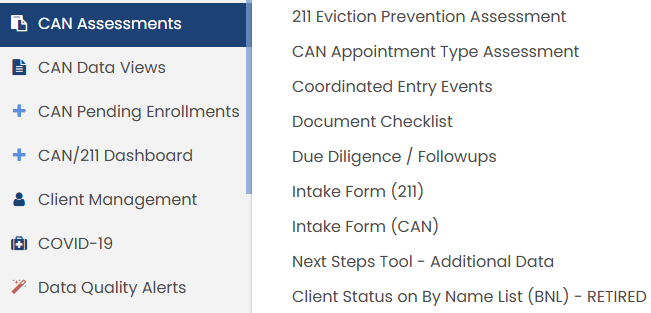
Coordinated Entry Events
Please refer to Coordinated Entry Event in the CaseWorthy – Coordinated Access Network and Coordinated Exit Quick Guide
Due Diligence / Follow Ups
Add New
- Find the client Caseworthy using the “Find Client” feature in the left menu.
- Once the client is loaded in the top left corner, click on “CAN Assessments” in the left menu to launch the sub menu.
- Click on “Due Diligence / Followups” in the sub menu to launch the Due Diligence / Followups – CA – Summary page.
- Click “Add New” to create a new Follow up.
- Choose the correct CAN enrollment that the follow up should be attached and complete the form. Click “Save” once all the information has been entered. The Due Diligence / Followups – CA – Summary page will load and the follow up that you just entered will be displayed.
Edit
- Find the client Caseworthy using the “Find Client” feature in the left menu.
- Once the client is loaded in the top left corner, click on “CAN Assessments” in the left menu to launch the sub menu.
- Click on “Due Diligence / Followups” in the sub menu to launch the Due Diligence / Followups – CA – Summary page.
- Click the “Gear” next to the follow up that you wish to edit.
- Click “Save” once all the information has been updated. The Due Diligence / Followups – CA – Summary page will load.
Document Checklist
How to upload files and documents in HMIS
You can upload any saved file/document to a client’s record (ex. Sharing Consent, Copy of Id, Birth Certificate, Utility bills, etc)
To upload a file or document in CaseWorthy/CT HMIS, follow these steps:
- On the left-side navigation, click “Case Management”.
- On the sub-menu, click “Files and Documents”.
- When the dashboard for “View Photos” is displayed, click on “Documents”.
- The “Document Check – CTHMIS” screen will load. Click on “Add New” in the top right corner of that page.
- Complete all required fields by choosing the Document Type, Verification Method, and Storage Location.
- Upload the image by clicking on “Browse” to choose from the list of saved files on your computer/server. Once the desired file is located, double-click on it to upload it.
- Click “Save” and the file will be uploaded to the client’s record in HMIS.
- To view the documents and files that a client has in HMIS, simply click on Documents or View Photos (located in the View Photos dashboard found after clicking on Files and Documents in the left-side menu).
For more detailed instructions, you can visit the CT HMIS support page.
Additional Assessments in CAN Assessments menu
The 211 Eviction Prevention Assessment, CAN Appointment Type Assessment, Intake Forms (211 and CAN), Additional Data (CAN), Next Steps Tool – Additional Data, are forms completed during workflows. You will only access these forms though this menu if you want to review or edit already existing data.
The full CaseWorthy – Coordinated Access Network and Coordinated Exit Quick Guide and additional information/support resources can be located on cthmis.com.