CT HMIS – How to Access and Use the HOPWA Provider Waitlist Quick Guide
To download or print this document, please click here.
Table of Contents
Add Client to HOPWA Waitlist (Workflow)
Overview
The purpose of this guide is to help you understand how to use the HOPWA Waitlist features in the left menu of HMIS.
Instructions
Your Role must be set to DOH AIDS/HOPWA.
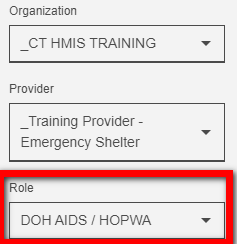
This will allow the “HOPWA Waitlist” option to be visible. The below items will available in the sub-menu:
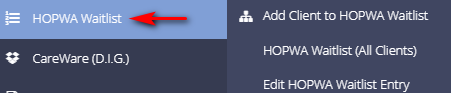
Add Client to HOPWA Waitlist (Workflow)
This will launch the workflow that will allow you to search for/create a client and add them to the waitlist.
- Click on “HOPWA Waitlist”, in the left side menu.
- Choose the option “Add Client to HOPWA Waitlist” from the sub-menu to launch the workflow.
- Enter the CaseWorthy ID or the first few letters of the First and Last Name and Date of Birth.
- Click “Check for duplicates” and review the results. If the client is located in the search list, click on their name.
- If no matches are found, you must click the “This is a new client” button to proceed. If a match is found, click on the name to select it.
- Complete all required fields indicated by the stars.
- Enter/Review any contact information visible or provided by the client.
- Click “Save” in the bottom right corner.
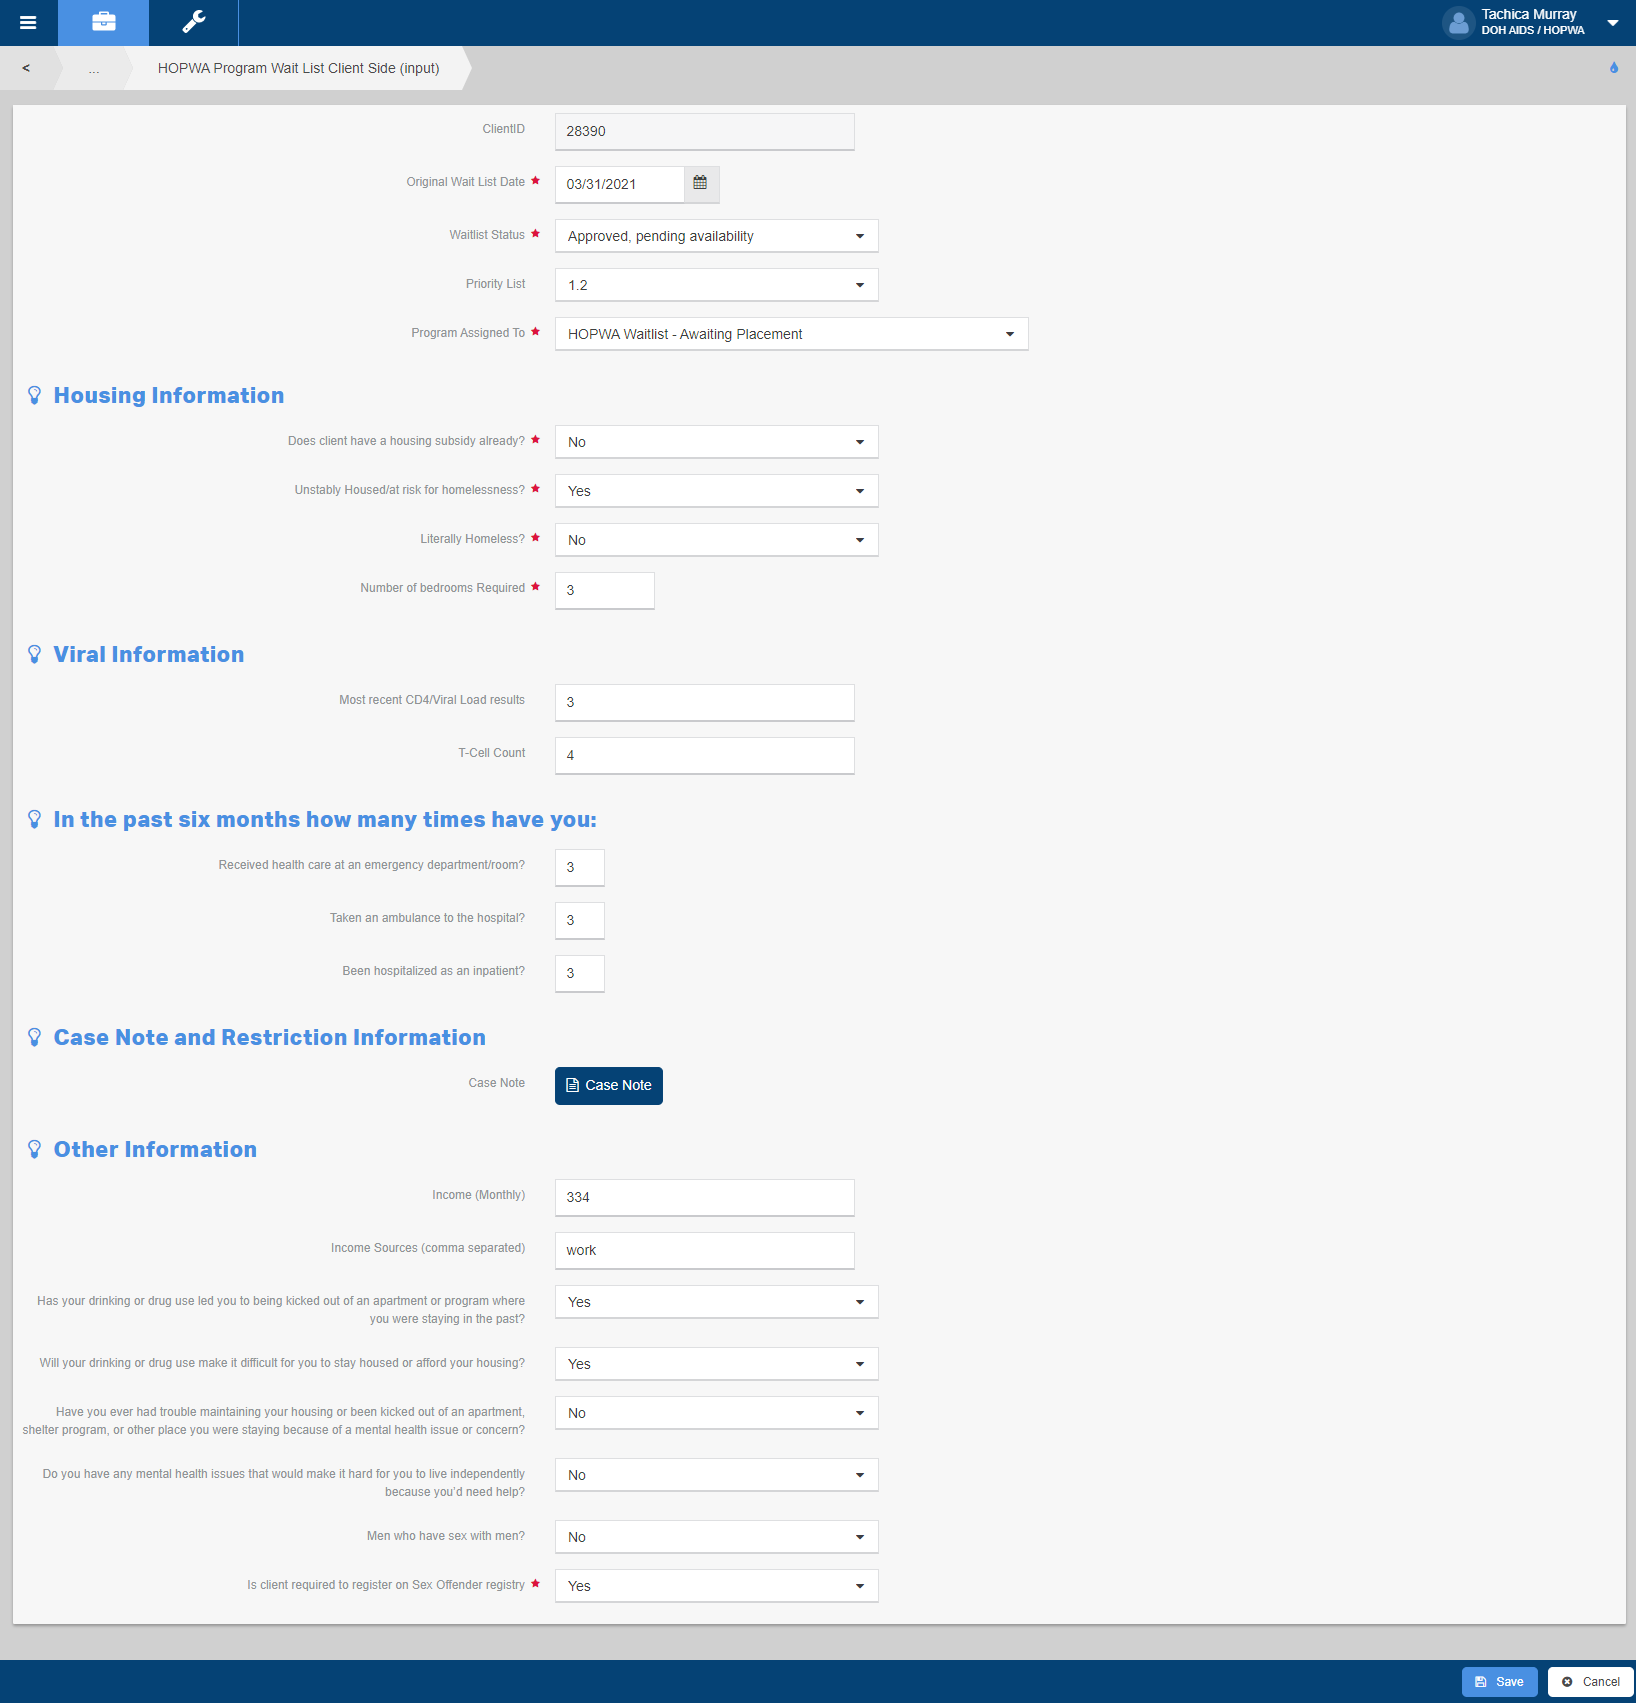
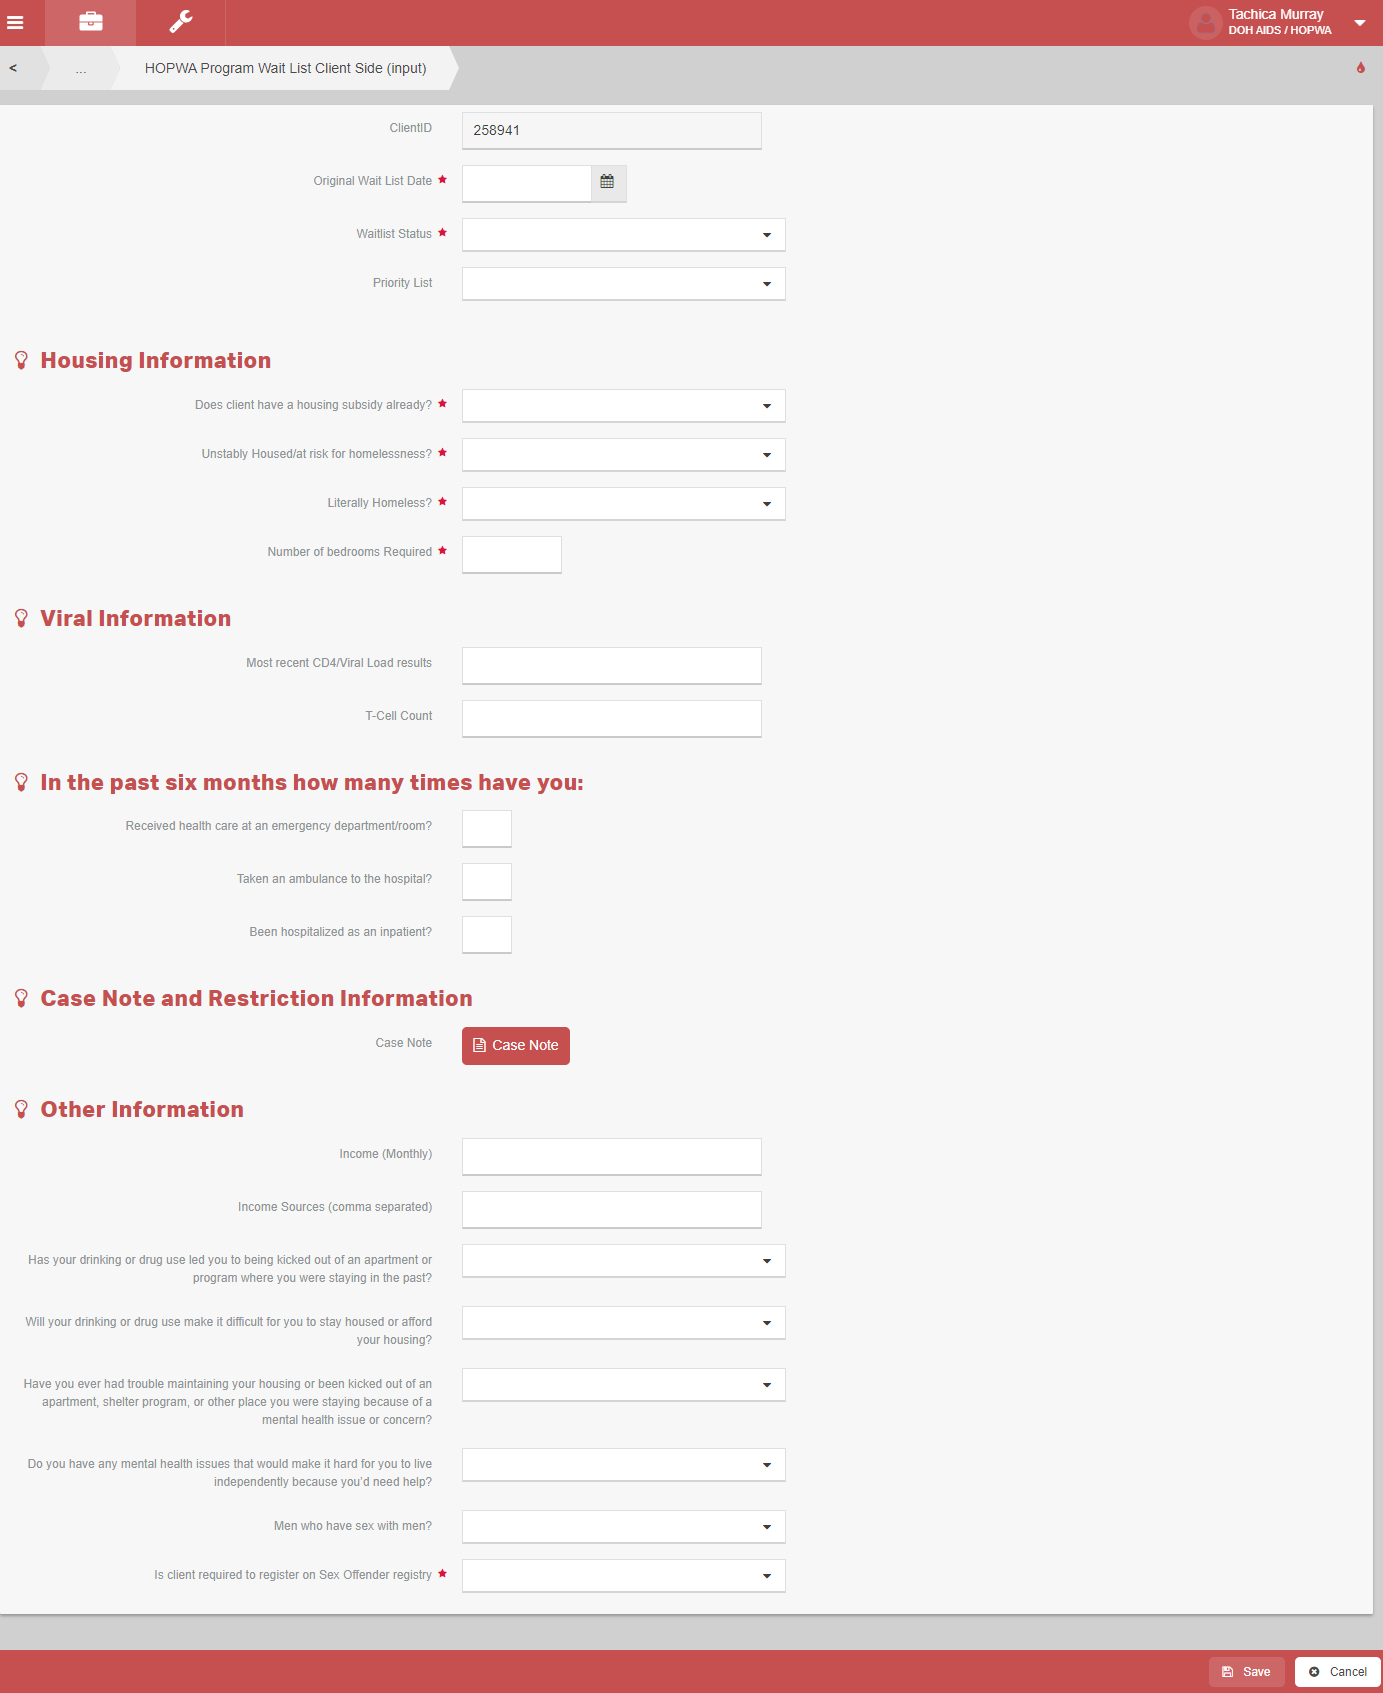
- The “HOPWA Program Wait List Client Side (Input)” form will load.
-
- Enter the “Original Waitlist Date”.
- Select the client’s “Waitlist Status” for the waitlist entry.
- Open – Choose this option when a client is initially placed on the waitlist.
- Approved, pending availability – Maintain on waitlist
- Closed – Enrolled in program
- Closed – Services no longer needed
- Enrolled in RRH – Maintain on waitlist
- Choose the Prioritization List from the drop down menu.
- The “Program Assigned To” field will appear, select the applicable Program.
- Enter a “Case Note” for the waitlist entry.
- Complete the remaining required fields and enter the “Most Recent CD4/Viral Load” and “T-Cell Count” (not required) if the information is provided.
- Click “Save” in the bottom right corner. The workflow is now complete page will display.
Below are a list of the data elements on the HOPWA Program Wait List Client Side (Input) form:
- Original Wait List Date
- Waitlist Status
- Priority List
- Program Assigned To
Housing Information
- Does client have a housing subsidy already?
- Unstably Housed/at risk for homelessness?
- Literally Homeless?
- Number of bedrooms Required
Viral Information
- Most recent CD4/Viral Load results
- T-Cell Count
In the past six months how many times have you:
- Received health care at an emergency department/room?
- Taken an ambulance to the hospital?
- Been hospitalized as an inpatient?
Case Note and Restriction Information
- Case Note
Other Information
- Income (Monthly)
- Income Sources (comma separated)
- Has your drinking or drug use led you to being kicked out of an apartment or program where you were staying in the past?
- Will your drinking or drug use make it difficult for you to stay housed or afford your housing?
- Have you ever had trouble maintaining your housing or been kicked out of an apartment, shelter program, or other place you were staying because of a mental health issue or concern?
- Do you have any mental health issues that would make it hard for you to live independently because you’d need help?
- Men who have sex with men?
- Is client required to register on Sex Offender registry
HOPWA Waitlist (All Clients)
This item will load the full waitlist and all clients that have been entered. To export this form, click on the “Droplet icon” in the top right corner (below your Role) and choose “Excel Export”.
- Click on “HOPWA Waitlist” in the left side menu.
- Choose the option “HOPWA Waitlist (All Clients)” from the sub-menu to load the waitlist.
- To edit a client’s status or other waitlist information, click on the “Gear” next to their name and choose “Edit” from the menu that loads.
- Click “Save” in the bottom right corner only if you’ve changed data on the page.
- Do not click “Save” if you simply viewed the data.

Edit HOPWA Waitlist Entry
This item will allow you to view the Waitlist entries for the client loaded in the top left corner.
- Click on “HOPWA Waitlist” in the left side menu.
- Choose the option “Edit HOPWA Waitlist Entry” from the sub-menu to load the summary form.
- To edit a client’s status or other waitlist information, click on the “Gear” next to their name and choose “Edit” from the menu that loads.
- Click “Save” in the bottom right corner only if you’ve changed data on the page.
- Do not click “Save” if you simply viewed the data.